Here’s how you can replicate Action button on your older iPhone
Not upgrading but fancy with action button on the new iPhone? Check out what you can do.
- This article shares with you how you can replicate, enable and use existing iPhone features to act as action button.
- Although on the steps are mentioning iPhone and iOS, but the same steps are applicable for iPad and iPadOS.
- For other interesting articles, head to: iOS Tip & Trick, Games, FREE games & stuffs, how-to and more at JILAXZONE.
- If you find this article / content inside is already obsolete, do let me know by commenting on the comment section below so that I can update the article to reflect the latest process/news. Thanks.
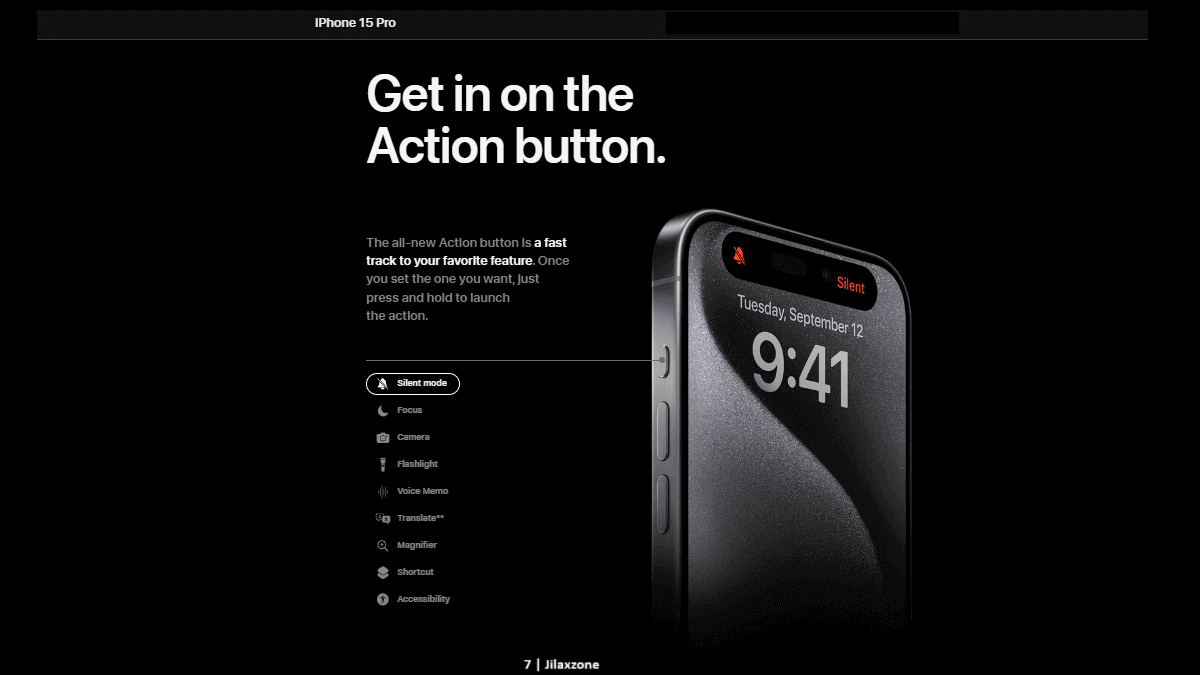
One biggest physical difference and appeals that is found on iPhone 15 Pro & iPhone 15 Pro Max but not on other iPhone models is the new Action button which replace the mute switch. With the new Action button, you can practically set it to do any kind of actions you want your iPhone to do – be it as a mute switch, to turn on flashlight, to start camera, to start voice recording, to run any shortcut, anything. The possibilities are endless! Fancy and cool, isn’t it? Yes, but only if you have the new iPhone 15 Pro or iPhone 15 Pro Max. What if you don’t? Well, that’s the reason I’m writing this article, to share with you – iPhone owners who want to have “Action” button capabilities on your iPhone.
Here’s how you can enable and use “Action” button on your older iPhone
Unfortunately, you can’t change mute switch to be action button on older iPhone (unless probably you jailbreak it).
The following steps are done on iPhone running iOS 17. If you are using different iOS version, the steps may be a bit different – since Apple throughout the iOS, keep revising the menu placement, however you should be able to easily find/spot the settings. Anyway, shout on the comment below in case you need help – I’ll try my best to answer and find the workaround for you.
There are at least 2 ways you can replicate iPhone 15 Pro & Pro Max action button by enabling and using the following methods.
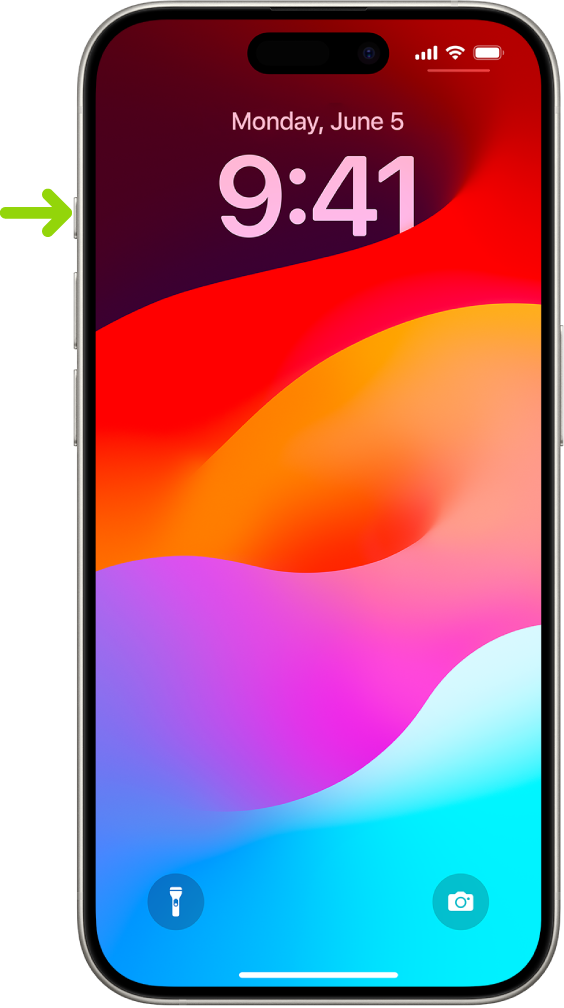
Method 1) If you prefer a physical button: Use Back Tap
Back Tap has been introduced since iOS 14 and supports any iPhone from iPhone 8 and up (see the my original writing on Back Tap: Back Tap what, how, where and when to use at JILAXZONE). Unlike other available buttons on iPhone, this Back Tap is a lesser known “button” since it’s hidden on the surface of the iPhone back cover.
How to configure Back Tap as Action button
To enable and use Back Tap, follow these steps:
Step 1) On your iPhone, go to Settings > Accessibility > Touch > Back Tap.
Step 2) There are 2 options: Double Tap and Triple Tap. Tap one of the two to set the actions.
The actions supported by Back Tap are these:
- Accessibility shortcut
- App Switcher
- Camera
- Control Center
- Flashlight
- Home
- Lock Rotation
- Lock Screen
- Mute
- Notification Center
- Reachability what is it?, check here)
- Screenshot
- Shake
- Siri
- Spotlight
- Volume down
- Volume up
- Assistive Touch
- Background Sounds
- Classic Invert
- Color Filter
- Control Nearby Devices
- Dim Flashing Lights
- Live Captions
- Live Speech
- Magnifier
- Smart invert
- Speak screen (clever use of it, check here)
- VoiceOver
- Zoom
- Zoom Controller
- Scroll Down
- Scroll Up
- And Shortcuts (check out recommendation here)
How to use Back tap as Action button
Once set, you can try to double tap or triple tap anywhere on the back on the iPhone to trigger the set actions.
- If you are using iPhone XS and before, do Back Tap on the iPhone logo.
- If you are using iPhone 11 and after, do Back Tap above iPhone logo and below the camera.
Method 2) If you are ok with digital button: Use Assistive Touch
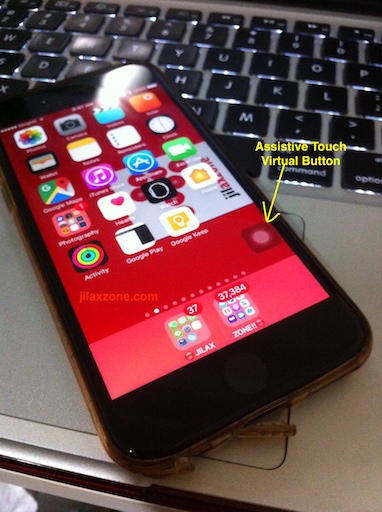
Assistive Touch has been around since perhaps iOS 6 back in 2012 and are available to all iPhone that can run iOS 6 or up. Similar to Back tap, you can configure Assistive Touch to perform actions based on your settings.
Here’s how to configure Assistive Touch as Action button.
Step 1) Go to Settings > Accessibility > Touch.
Step 2) Inside Touch page, tap on AssistiveTouch and switch it ON.
Step 3) Customize AssistiveTouch by tapping o these options:
a) Customize Top Level Menu
b) Single-Tap
c) Double-Tap
d) Long Press

On each of the available options, you can configure AssistiveTouch to do the following actions:
- Open Menu
- Pass Through to App
- Accessibility shortcut
- Analytics
- App Switcher
- Camera
- Control Center
- Double Tap
- Hold and Drag
- Home
- Lock Rotation
- Lock Screen
- Long Press
- Move Menu
- Mute
- Notification Center
- Pinch
- Pinch and Rotate
- Reachability what is it?, check here)
- Restart
- Screenshot
- Shake
- Siri
- SOS
- Spotlight
- Volume down
- Volume up
- Apple Pay
- Background Sounds
- Control Nearby Devices
- Dim Flashing Lights
- Live Captions
- Live Speech
- Speak screen (clever use of it, check here)
- Continous Horizontal Scroll
- Continous Vertical Scroll
- Scroll Down
- Scroll Left
- Scroll Right
- Scroll to Bottom
- Scroll to Top
- Scroll Up
- Enable/Disable Fallback
- Move Menu
- Tap
- Toggle Pause/Resume Dwell
- And Shortcuts (check out recommendation here)
How to use Assistive Touch as Action button
Once AssistiveTouch has been enabled, you should see white rounded button on your iPhone screen. Either do a single tap, double tap or long press to enable actions that you have set earlier.
My recommended setup for you
Many of you will find Back Tap button to be hit-or-miss, when you Back Tap your iPhone, the action may or may not get trigger – this could be because you don’t Back Tap properly or you are using a case that’s way too thick. So, to avoid your frustration, I would highly recommend you to use Assistive Touch instead. Caveat is to use Assistive Touch, your iPhone must be in on position (screen turned on).
How I setup my “Action” button using Assistive Touch
When it comes to holding iPhone, I’m left-handed. So, all the actions I set is more for left-handed person. You can freely follow or customize on your own.
1) Customize AssistiveTouch Top Level Menu
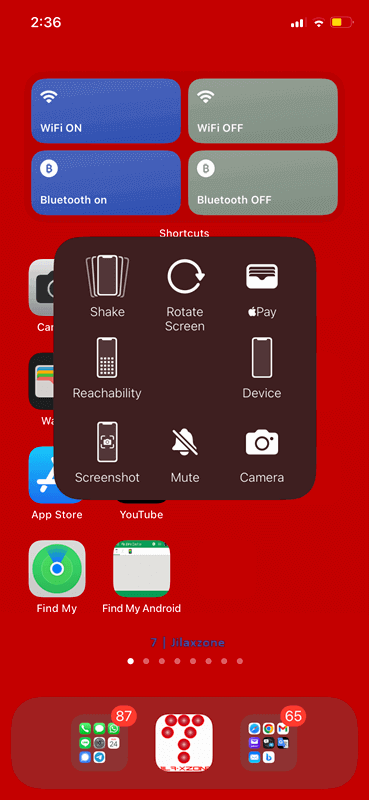
I enabled 8 buttons. From right to left (clock-wise), here they are:
- Top: Rotate Screen
- Top right: Apple Pay
- Right: Device
- Bottom right: Camera
- Bottom: Mute – to mute/unmute the iPhone
- Bottom Left: Screenshot
- Left: Reachability – to reach upper screen within 1 single hand
- Top Left: Shake – for undoing text input easily
2) Customize the Assistive Touch actions
Here’s my AssistiveTouch action arrangement:
- Single tap: Open Menu, so that the “Top Level Menu” is shown
- Double tap: Lock Screen – to turn off the screen
- Long press: Home
Bring it all together
While it’s not a perfect solution but with the workaround shared above – either using Back Tap button or Assistive Touch – you can experience how Action button works on iPhone 15 Pro and Pro Max on your older/unsupported iPhone. The good thing is that, on both options – Back Tap or Assistive Touch – can trigger Shortcuts – so the possibilities are endless for you! In case you encountered any difficulties and/or have queries, don’t hesitate to put your queries or thoughts on the comment section down below. I’ll be happy to assist.
Interested to see other iPhone and iOS tips and tricks? Check them out here: iPhone and iOS tips and tricks at JILAXZONE.
Hi, thanks for reading my curated article. Since you are here and if you find this article is good and helping you in anyway, help me to spread the words by sharing this article to your family, friends, acquaintances so the benefits do not just stop at you, they will also get the same goodness and benefit from it.
Or if you wish, you can also buy me a coffee:

Thank you!
Live to Share. Share to Live. This blog is my life-long term project, for me to share my experiences and knowledge to the world which hopefully can be fruitful to those who read them and in the end hoping to become my life-long (passive) income.
My apologies. If you see ads appearing on this site and getting annoyed or disturb by them. As much as I want to share everything for free, unfortunately the domain and hosting used to host all these articles are not free. That’s the reason I need the ads running to offset the cost. While I won’t force you to see the ads, but it will be great and helpful if you are willing to turn off the ad-blocker while seeing this site.
Do you have anything you want me to cover on my next article? Write them down on the comment section down below.
Alternatively, find more interesting topics on JILAXZONE:
JILAXZONE – Jon’s Interesting Life & Amazing eXperience ZONE.