DolphiniOS Waiting for JIT workaround fix | iOS 14.4, iOS 15 and up
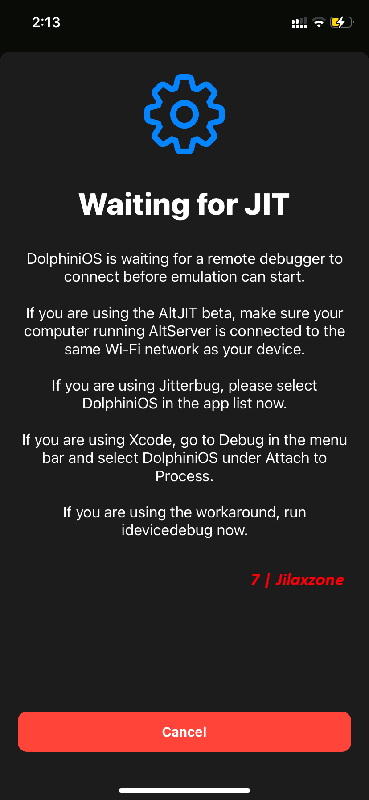
Using DolphiniOS to play Nintendo Wii and Nintendo GameCube games on your iPhone or iPad and getting “Waiting for JIT” error message? Well, don’t worry, in this article, I’ll show you in the detail, how you can workaround the error message to fix the issue so that you can continue playing Nintendo Wii / Nintendo GameCube games on your Apple devices.
If you have not installed DolphiniOS or your DolphiniOS is not the latest updated version, check out here for detail steps: Installing & Updating DolphiniOS on iPhone and iPad at JILAXZONE.
- This tutorial detailed the steps to fix “Waiting for JIT” error found on DolphiniOS, so that you can continue playing Nintendo Wii & Nintendo GameCube games on your iPhone running on latest iOS.
- No jailbreak nor any forms of subscriptions is required.
- This tutorial though intended for iPhone, but all the steps provided here works and applicable for iPad as well as iPod Touch.
- For other interesting articles related to gaming, check it out here DolphiniOS, Nintendo Wii, Nintendo GameCube, Xbox, PS5, Nintendo Switch, other gaming, iOS, Tech or more at JILAXZONE.
- If you find this article / content inside is already obsolete, do let me know by commenting on the comment section below so that I can update the article to reflect the latest process/news. Thanks.
DolphiniOS: Waiting for JIT – What is it & why is it now throwing this error message?
JIT is short for Just-In-Time compiler. It’s a method, like its name implies, to compile codes during execution, so the codes will then translated into device native code which resulted in faster performance. Apple quietly introduced this feature back in iOS 14.2, however quickly pulled them out on iOS 14.4. That’s the reason, if you are on iOS 14.4 or above, you are getting “Waiting for JIT” message on DolphiniOS.
DolphiniOS: Waiting for JIT workaround fix
There are few workarounds and fixes available for this “Waiting for JIT” error. The one I’m sharing here is using “iDeviceDebug” method, which is also known as “tether method” invented by Jkcoxson and Spidy123222. Refer to the link here to see their original work.
The step by step guide I provided here is intended for you who are especially not geeky & not-so technical. While the steps are so thorough and details, however in any case you are confused with any of the steps, don’t hesitate to ask via the comment section down below. I’ll be happy to help.
So without further ado, here’s the “iDeviceDebug” workaround to fix “Waiting for JIT” error message you are getting while opening and running DolphiniOS.
| The steps written here are tested on: a) Latest iOS – at the time this article is written is iOS 15 Public Beta 3 and using the iPhone that I currently have – iPhone XR. In case you are not on iOS 15 or iPadOS 15 yet, check the link here to get iOS 15 & iPadOS 15: Here’s how to update iPhone to iOS 15 today (iPad and iPod Touch included!) at JILAXZONE. b) Latest Windows – at the time this article is written is Windows 11 Pro Preview Build 22000.100 co_release. In you are also using Windows and would like to install Windows 11, check the link here to get them installed: Getting Windows 11 and installing on your Computer at JILAXZONE. Should you are using different version of iOS or iPadOS and / or different computer OS (such as Linux / Mac), the steps may be slightly different but should not deviate too much. Anyway, in case you have questions / issues, feel free to put them down on the comment section down below, I’ll be more than happy to help you. |
Step 1) Connect your iPhone and ensure iTunes recognize it
Plug in your iPhone to your Computer. Open iTunes if it’s not automatically opened. Ensure your iPhone is recognized by iTunes and shown up on iTunes.
Do NOT unplug your iPhone until the rest of the steps here.
Step 2) Download libimobiledevice
libimobiledevice is set of libraries to communicate with services on iOS devices using native protocols. You can get libimobiledevice from the following link.
| Download libimobiledevice | https://github.com/libimobiledevice-win32/imobiledevice-net/releases/ |
Choose zip file according to your Computer OS. Since I’m using Windows, so I downloaded the Windows version.
| For easier references throughout the article: 1) regardless of the Computer version (whether Windows, Mac, or Linux), let’s just call the zip file downloaded from the link as “libimobiledevice.zip” 2) Since I’m using Windows and because different Windows Computer has different drive, for the rest of this article, I will use “D:\Programs\libimobiledevice” as the “libimobiledevice download folder”. You have the option to follow or use your own folder preference. |
Step 3) Navigate to “libimobiledevice download folder” and unzip the “libimobiledevice.zip”
Once downloaded into “libimobiledevice download folder” (inside “D:\Programs\libimobiledevice”), unzip “libimobiledevice.zip” file and place all the files into “libimobiledevice download folder” (inside “D:\Programs\libimobiledevice”).
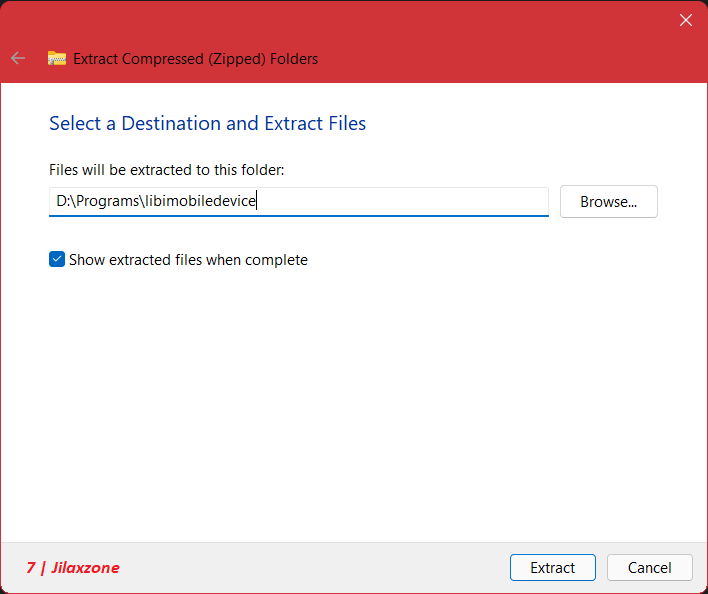
If you do it correctly, you should be able to see “idevice_id.exe”, “ideviceimagemounter.exe” and “idevicedebug.exe” under “libimobiledevice download folder” (inside “D:\Programs\libimobiledevice”).
Step 4) Open Command Prompt / Terminal, navigate to “libimobiledevice download folder”
On your Computer and assuming “libimobiledevice download folder” is located at “D:\Programs\libimobiledevice”, do the following:
Step 4a) Click on Windows button, type “Command Prompt”, then press Enter. Command Prompt window will then open.
Step 4b) Inside the Command Prompt window, type “D:” without the double quotes. Then press Enter. If your “libimobiledevice download folder” is different from mine, adjust the command yourself.
Step 4c) Inside the Command Prompt window, type “CD D:\Programs\libimobiledevice” without the double quotes. Then press Enter. If your “libimobiledevice download folder” is different from mine, adjust the command yourself.
If you are doing the steps correctly, now your Command Prompt should be showing the “libimobiledevice download folder” at “D:\Programs\libimobiledevice” or in case your “libimobiledevice download folder” is different from mine, your Command Prompt should be showing your folder location.
Step 5) Getting iPhone UDID via Command Prompt / Terminal
On your Computer and assuming “libimobiledevice download folder” is located at “D:\Programs\libimobiledevice”, do the following:
Step 5a) Inside the Command Prompt window, type “idevice_id.exe” without the double quote. Then press Enter.
Step 5b) Take note of the 25 character (including the “-“) of your iPhone UDID. The iPhone UDID is shown in this format: XXXXXXXX-XXXXXXXXXXXXXXXX (USB).

Step 6) Check and get DolphiniOS Package ID.
On your iPhone, do the following:
Step 6a) Open AltStore app, then navigate to My Apps. Tap on “View App IDs”.
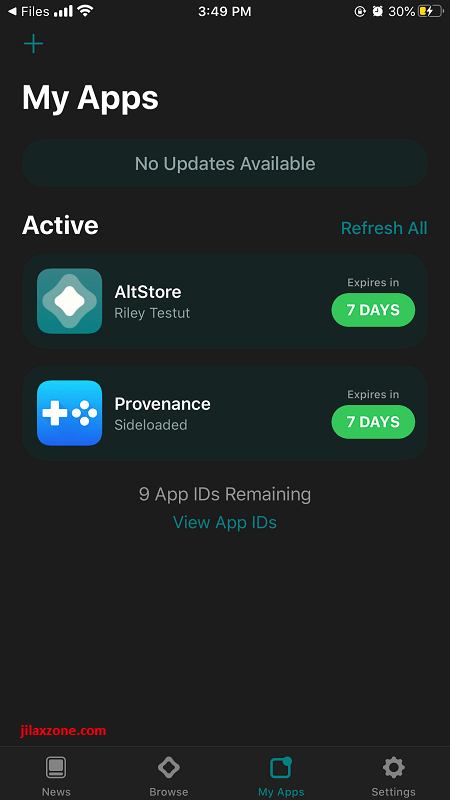
Step 6b) Find DiOS or DiOS Beta. Then write down the text you find below. It’s case sensitive, so be careful not to write them wrongly. This text is DolphiniOS Package ID, which is unique on every device. The DolphiniOS Package ID is shown in this format: me.oatmealdome.DolphiniOS-njb-XXXXXXXX.YYYYYYYYYY where XXXXXXXX refers to your DolphiniOS version and YYYYYYYYYY refers to your unique Apple Developer Beta ID.
| Here’s the template you can use, so you don’t need to write them from scratch. Do change accordingly based on your device DolphiniOS Package ID. DolphiniOS Release Build: me.oatmealdome.DolphiniOS-njb.YYYYYYYYYY DolphiniOS Beta Build: me.oatmealdome.DolphiniOS-njb-patreon-beta.YYYYYYYYYY |
Step 7) Download Developer Disk Image.
This image is used to inject the Just-In-Time (JIT) code / program into your iPhone. Download developer disk image according to your iOS version. For example: If you are like me, using iOS 15, then download the developer disk image for iOS 15.
On your Computer, do the following:
Step 7a) Open your Computer browser and click one of the links. For iOS 15, you can go to the Link #1 to get the developer disk image. For other iOS version, check both links to get your correct version.
Step 7b) Once you have found the correct version that match with your iOS version, download the zip file.
| Link # | Download Link |
|---|---|
| Link #1 | https://github.com/mspvirajpatel/Xcode_Developer_Disk_Images/releases/ |
| Link #2 | https://github.com/pdso/DeveloperDiskImage/tree/master |
If you are like me, using iOS 15, I download the 15.0.zip file.
| For easier references throughout the article: Due to different iOS version has different zip filename, for the rest of this article, let’s just call the whichever version of zip file as “developer disk image.zip”. |
Step 8) Unzip the “developer disk image.zip” into “libimobiledevice download folder”
On your Computer and assuming “libimobiledevice download folder” is located at “D:\Programs\libimobiledevice”, do the following:
Step 8a) Unzip “developer disk image.zip”. In my case, it’s the “15.0.zip”.
Step 8b) Check the files generated. If you did it correctly, you should see 2 files: DeveloperDiskImage.dmg and DeveloperDiskImage.dmg.signature.
Step 9) Mount Developer Disk Image
This step requires your iPhone to be in unlock position with screen turned on. If the iPhone screen goes off, the process will fail and throw error.
On your Computer, with Command Prompt window is still opened and assuming “libimobiledevice download folder” is located at “D:\Programs\libimobiledevice”, do the following:
Step 9a) Inside the Command Prompt window, type “ideviceimagemounter.exe D:\Programs\libimobiledevice\DeveloperDiskImage.dmg” without the double quotes. Then press Enter.

Step 9b) Ensure you are getting “Status: Complete” message on Command Prompt window after executing the previous step.
Step 10) Running iDeviceDebug
On your Computer, with Command Prompt window is still opened and assuming “libimobiledevice download folder” is located at “D:\Programs\libimobiledevice”, do the following:
Step 10a) Inside Command Prompt window, type “idevicedebug -u <iPhone UDID> –detach run <DolphiniOS PackageID>” without double quotes.
Replace <iPhone UDID> with your iPhone Unique UDID (check Step 5).
Replace <DolphiniOS Package ID> with your own DolphiniOS unique Package ID (Check Step 6).

Step 10b) Press Enter to execute the command.
Step 10c) If you run the command correctly with correct iPhone UDID and correct DolphiniOS Package ID, dolphiniOS app on your iPhone will open.
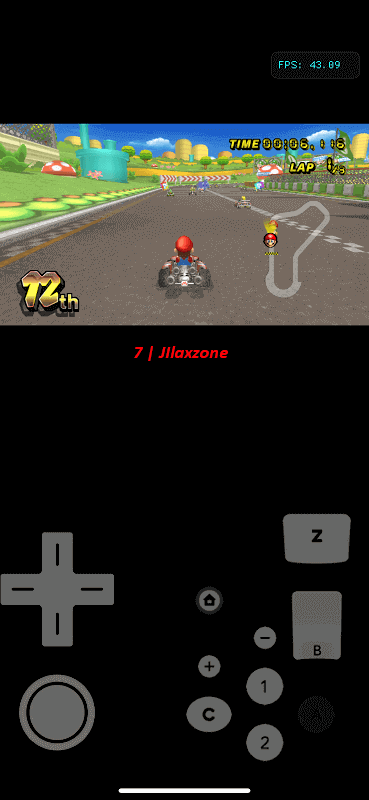
Congratulations! You just enable Just-In-Time (JIT) code on DolphiniOS via the iDeviceDebug tether process. Now, it’s time to celebrate is by playing any of your favorite Nintendo Wii games. At this moment, it’s safe to unplug your iPhone from your Computer.
| Suggestions: Because the whole configuration process is a tether process, in which if DolphiniOS on your iPhone is closed / killed, you need to redo the tether process in order to (again) run Nintendo Wii / Nintendo GameCube games, so I would suggest you to save these commands on your Computer, so whenever you need them, you just execute them. Here are the important commands for Command Prompt: > D: > CD D:\Programs\libimobiledevice > idevice_id.exe > ideviceimagemounter.exe D:\Programs\libimobiledevice\DeveloperDiskImage.dmg > idevicedebug -u <iPhone UDID> –detach run <DolphiniOS Package ID> |
Bring it all together
With the “iDeviceDebug” tether workaround, I can run DolphiniOS and play both Nintendo Wii and Nintendo GameCube back on my iPhone running on the latest iOS. On my test using iPhone XR, I can run Super Mario Sunshine (GameCube) on 30 FPS (this is the max FPS for the game, check here for discussion on Reddit) and Mario Kart Wii on 40-50 FPS. Still reasonably impressive!
So, don’t wait, try the workaround – if you haven’t – to get rid of the “Waiting for JIT” error and go play!
Do you have anything you want me to cover on my next article? Write them down on the comment section down below.
Alternatively, find more interesting topics on JILAXZONE:
JILAXZONE – Jon’s Interesting Life & Amazing eXperience ZONE.
Hi, thanks for reading my curated article. Since you are here and if you find this article is good and helping you in anyway, help me to spread the words by sharing this article to your family, friends, acquaintances so the benefits do not just stop at you, they will also get the same goodness and benefit from it.
Or if you wish, you can also buy me a coffee:

Thank you!
Live to Share. Share to Live. This blog is my life-long term project, for me to share my experiences and knowledge to the world which hopefully can be fruitful to those who read them and in the end hoping to become my life-long (passive) income.
My apologies. If you see ads appearing on this site and getting annoyed or disturb by them. As much as I want to share everything for free, unfortunately the domain and hosting used to host all these articles are not free. That’s the reason I need the ads running to offset the cost. While I won’t force you to see the ads, but it will be great and helpful if you are willing to turn off the ad-blocker while seeing this site.


étape 6 ces n’importe quoi jpet un câble t’esplique trop male et tu montre pas en dirais ta inventer l’étape
t’as altstore au moins ?
et idevice_id.exe sans guilletmai sa marche pas aussi mdr jvai laisser tomber Apple ces des chien a nous faire galérer comme sa
Hi,
Any difficulty you are facing on Step 6?
hey when i mout the diskimagemounter i get a “Error: ImageMountFailed” message pls help me i can’t find a solution
Hi Jacqueter,
Likely it’s the issue with the double quotes signs. Try to remove the double quotes symbols and type the double quote symbols yourself.
Alternatively, try restarting your Computer and try again mounting. See if it now runs ok.
still not working
Hi Jacqueter,
Are you still getting the same “Error: ImageMountFailed”? Or other error message?
Where did you put the idevice_id on your iMac?
no i’m still getting the same error and i’m using a windows computer
oh and by the way on iphone X running ios 15.3
Hi Jacqueter,
It seemed you may be use the wrong path to run the command. If you can let me know where you put these files on your Windows computer, I should be able to help.
a) DeveloperDiskImage.dmg. Tell me where do you store this file?
b) ideviceimagemounter.exe. Tell me where do you store this file?
sorry ,but i am not the most tech savvy and i was wondering if you could help me step by step on discord? not as in a call or anything, but so i can send you screenshots so you can guide me to the next step. my discord is DoodleDonkey45#2122
I need a little help, I don’t get it, because I used a different folder name to extract my libimobiledevice folder thing, and I’m not good with tech. So I just wondered if you can help me?
I don’t know what commands to do, because my extracted libimobiledevice folder is different. Can we talk on Gmail. I’m very good with Gmail.
Hi Mohammed,
Which steps are you lost? As an alternative, try to follow the folder name I gave so you won’t get lost.
D:\Programs\libimobiledevice>idevice_id.exe
00008030-00062CE9263A802E (USB)
D:\Programs\libimobiledevice>ideviceimagemounter.exe D:\Programs\libimobiledevice\DeveloperDiskImage.dmg
Uploading D:\Programs\libimobiledevice\DeveloperDiskImage.dmg
done.
Mounting…
Error: ImageMountFailed
D:\Programs\libimobiledevice>
why
Hi Starj,
Most likely you are download the wrong Disk Image. Which iOS / iPadOS version are you using?
If you are using iOS 15, then download the Disk Image for iOS 15.
If you are using iOS 14, then download the Disk Image for iOS 14.
Try redo Step 7) and download the correct Disk Image.
Let me know the outcome.
按照你说的操作 并且下载对了磁盘映像 但还是显示E:\libimobiledevice>ideviceimagemounter.exe E:\libimobiledevice\DeveloperDiskImage.dmg
Uploading E:\libimobiledevice\DeveloperDiskImage.dmg
done.
Mounting…
Error: ImageMountFailed
Hi,
Please download the correct disk image based on your iOS version.
So I’m on the final step but whenever I run the command I get this
Usage: idevicedebug [OPTIONS] COMMAND
Interact with the debugserver service of a device.
Where COMMAND is one of:
run BUNDLEID [ARGS…] run app with BUNDLEID and optional ARGS on device.
The following OPTIONS are accepted:
-u, –udid UDID target specific device by UDID
-n, –network connect to network device
–detach detach from app after launch, keeping it running
-e, –env NAME=VALUE set environment variable NAME to VALUE
-d, –debug enable communication debugging
-h, –help prints usage information
-v, –version prints version information
Homepage:
Bug Reports:
I’m not sure what I need to do now
Hi Adrian,
Which iOS version are you currently using?
Try to type the whole command yourself, don’t copy and paste from what you see from my blog (there are differences in the “-” symbol when you type vs when you copied from my blog).
So I’m on step 9 and when I press enter it says “Device not found”. And I want to know if the ios disk images also work for Ipados.
Hi Simplistic,
On your question whether iOS disk image also works for iPadOS, unfortunately I don’t have iPad myself, so I couldn’t try it out for you.
However, you can use the following steps to easily run DolphiniOS. Let me know if you are stuck.
https://jilaxzone.com/2022/05/11/how-to-use-altjit-altstore-built-in-jit-compiler-on-iphone-the-easy-way-free/