Bring your iPhone to the next level: A Custom Ringtone
A distinctive Home screen icons with customized ringtone are the perfect combination for iPhone users who wants to be different from the rest…
- Be different and distinctive, express yourself with the custom ringtone
- Easy-to-do in 7 steps to create and use custom ringtone for your iPhone.
- For other iOS tweaks, refer to this sub: iOS.
So you have fully customized your Home screen with customized icons and widgets, now it’s time to bring it to the next level: a custom ringtone!
Don’t let your iPhone ring the same sound with your peers. Here’s how you can personalize your iPhone ringtone.
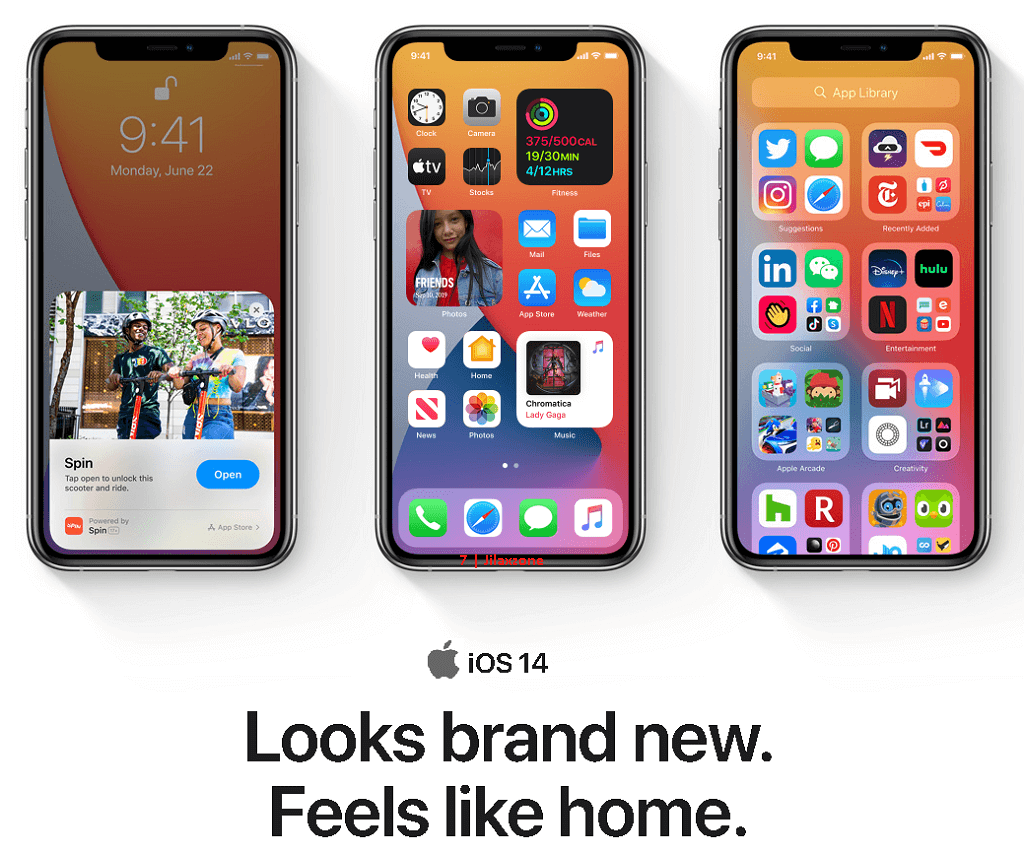
For those who are missing out, don’t you worry – let me summarize it for you. When Apple released iOS 14, there’s this one “accidental” new feature where it lets people to customize their Home screen icons with custom icon sets. Now apart from changing your wallpaper to look different from the rest, you can also change any icons to sets of icon your preferred. So if you have already used iPhone with iOS 14 or even up, but haven’t done any customizing, then it’s time to customize them so your iPhone won’t look the same like every other iPhone out there. And this article is to bring the customization to the next level: a customized iPhone ringtone!
Prerequisite required to create custom iPhone ringtone.
These are the things you need before customizing the iPhone ringtone.
Prerequisite tools:
1) Computer with latest iTunes installed (PC or Mac).
2) Song or ringtone you want to make it as your ringtone (preferably M4A, M4R or MP3 file).
3) And of course, the iPhone.
Prerequisite steps:
1) Add the song or ringtone file to iTunes – if it’s not available yet on iTunes.
Creating a Custom Ringtone for iPhone
Unfortunately as of when this article is written, there’s no one button do-it-all when it comes to create a custom ringtone for iPhone. You need to follow these easy-to-be-done 7 steps.
I’m using iTunes 12 and iPhone with iOS 14. In case you are using a different version of iTunes or different version of iOS (Eg: iOS 13 or iOS 12 or even before), the steps might be slightly different but overall using the guided steps below you should be able to figure them out easily.
1) Prepping the Ringtone. Open the song on iTunes and trim the song to be max 30 seconds-long. iOS ringtone can only accept 30-seconds long sound file for its ringtone.
Here’s how to trim any song to 30 seconds-long:
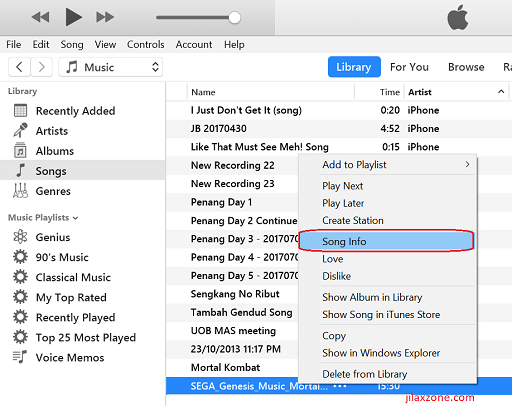
a) On iTunes, do right click on the song you wish to use as the ringtone then select Song Info.
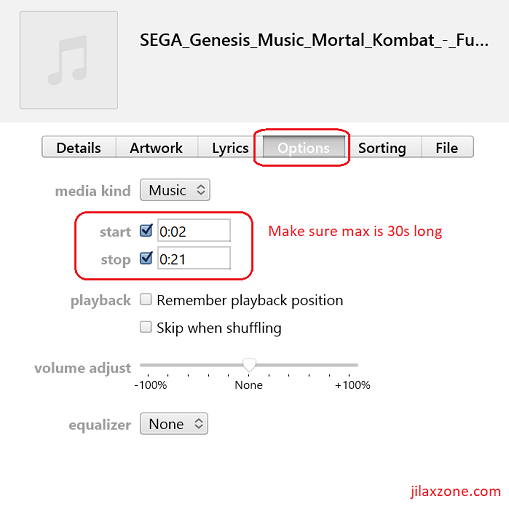
b) On the Song window, go to Options, and adjust the start and stop to be max 30-second-long. Less than 30-second is fine.
2) Convert the 30 seconds-long song to AAC format. For the record, iOS only recognize AAC format ringtone/sound file.
Here’s how to convert the 30-seconds long song to AAC:
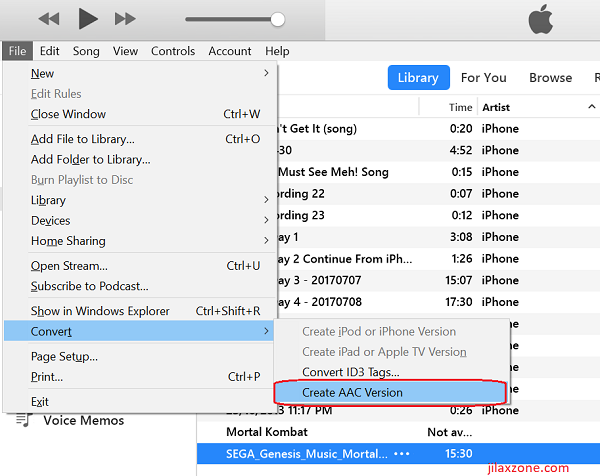
a) On iTunes, go to File > Convert > Create AAC version.
3) Locate the 30-seconds long AAC file and rename the file to .m4r. iOS only recognize AAC format with .m4r extension for its ringtone.
Here’s how to locate the AAC file on your Computer and Rename it to .m4r:
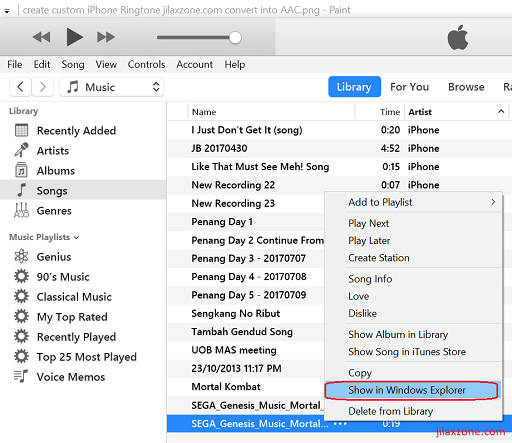
a) On iTunes, select the 30-second long song, do right click on it > Show in Windows Explorer (Windows) or Show in Finder (Mac OS).
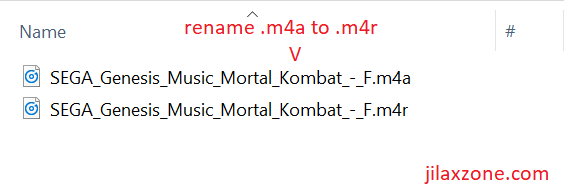
b) On the Windows explorer / Finder, rename the file to .m4r. m4r is the iPhone ringtone file.
4) Copy the Ringtone file to iTunes. By dragging and dropping the m4r file to iTunes library. Make sure the ringtone file appears on your iTunes Library.
5) Plug the iPhone to Computer running iTunes. Wait until the iPhone is recognized and appears on iTunes. Stop the sync process if it does sync automatically since sync is not needed at this moment.
6) Copy the Ringtone file to iPhone. Drag and drop the ringtone from iTunes Library to the iPhone inside the iTunes screen.
7) Sync! Now press that Sync button on bottom right at iTunes screen to sync the m4r ringtone file to the iPhone. Wait until it syncs completely.
Once sync is completed, proceed to the next step to check whether the iPhone has the custom ringtone synced to it.
Here’s how to check and set the custom ringtone on iPhone:
I’m using iOS 14 to make this guide. In case you are on other version of iOS, the steps though may differ a bit, but you should be able to get the idea on where to check and to set the custom ringtone on your iPhone.
On the iPhone, do the following steps:
1) Go to Settings > Sounds & Haptics.
2) Under Sounds and Vibration Patterns, locate Ringtone, tap on it.
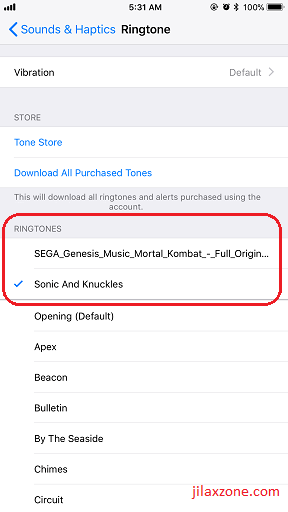
3) Your custom ringtones should be the first one in the row to appear.
4) Select the custom ringtone and then it’s done.
Now each time your iPhone rings, it will play your custom ringtone.
You just did customizing your iPhone Ringtone. Congrats!
Now your iPhone should have a distinctive sound when it rings. Ensure to set the volume to the maximum possible so everybody hears your customized iPhone ringtone. Eh, but please be considerate to other people too!
In case you are stuck on any of the steps above, do let me know your issues on the comment section down below, I’ll be glad to help.
Do you have anything you want me to cover on my next article? Write them down on the comment section down below.
Alternatively, find more interesting topics on JILAXZONE:
JILAXZONE – Jon’s Interesting Life & Amazing eXperience ZONE.
Hi, thanks for reading my curated article. Since you are here and if you find this article is good and helping you in anyway, help me to spread the words by sharing this article to your family, friends, acquaintances so the benefits do not just stop at you, they will also get the same goodness and benefit from it.
Or if you wish, you can also buy me a coffee:

Thank you!
Live to Share. Share to Live. This blog is my life-long term project, for me to share my experiences and knowledge to the world which hopefully can be fruitful to those who read them and in the end hoping to become my life-long (passive) income.
My apologies. If you see ads appearing on this site and getting annoyed or disturb by them. As much as I want to share everything for free, unfortunately the domain and hosting used to host all these articles are not free. That’s the reason I need the ads running to offset the cost. While I won’t force you to see the ads, but it will be great and helpful if you are willing to turn off the ad-blocker while seeing this site.