Turning On iMessage on Mac So You Can Send and Receive iMessage from Mac
Do you know that you can receive iMessage on Mac as well? In case you don’t, here are the steps to enable it.
In today’s ever-connected world, sending and receiving phone messages via computer is considered normal, even a must-have requirement especially for those working in front of computer the whole day. Reason being is you can response faster by using computer’s keyboard rather than phone touchscreen and save time by responding only via computer rather than having to interact with your phone.
WhatsApp messaging app has done that via browser interface. LINE messaging app also has done that via app that needs to be installed. Long before these 2 messaging apps and perhaps other messaging apps able to send/receive via computer, Apple had got it covered for its own messaging platform on its own devices – iPhone and Mac: the iMessage.
Here’s how to enable send/receive iMessage on Mac:
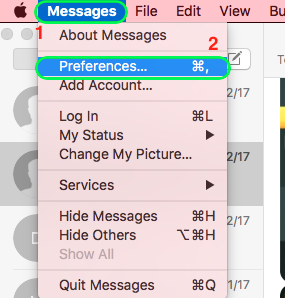
1. Find Messages icon and open the app
2. Once opened, navigate to Messages (beside Apple logo on top left corner of the screen) > Preferences
Find other awesome articles, tips, tricks related to Life and Tech, iOS & Android quick review on:
3. Select “Accounts” tab and find iMessage
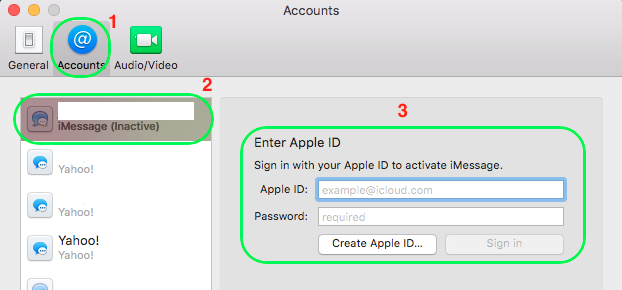
Just in case you can’t find iMessage, click on “+” sign below to add
4. Key in your Apple ID and password then hit the “Sign in” button
Or if you don’t have Apple ID before, you could create a new one by clicking on the “Create Apple ID” – by right if you own an iPhone, you should already have an Apple ID
5. Once signed in, configure the iMessage
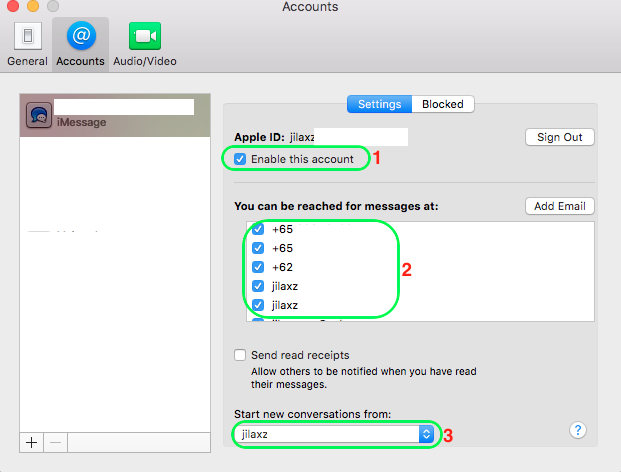
Make sure “Enable this account” is selected, then select from numbers and accounts you want to be reached at, tick “Send read receipts” if you want others to be notified when you have read their messages, then finally select number or accounts to start new conversation.
Your iMessage account is now set.
Now what you need to do is to start sending/replying those iMessages from Mac. Don’t be surprised though, from now onwards each time you’ll get an iMessage, you will receive both on your iPhone and on your Mac.
For Life & Tech tips, iOS & Android Apps and Games quick review, do visit below: