How to transfer Live Photos from iPhone to Android
Introduced back in 2015 with the release of iPhone 6S, Live photo was a feature where you can capture moving photo (it’s like a short 2-second video, but captured as photo) with your camera so your photo looks like a live photo (hence the name!). While the main intention is so that you can always get the best shot from your taken picture (check here on how you can do so: How to always get the best photo on every captures on your iPhone at JILAXZONE), but eventually Live photo become the “standard” on future iPhone because compared to standard photo, Live photo looks way better, especially if you scroll the photo one by one on your iOS Photo Albums.
- This article detailed the steps to transfer Live photo from iPhone into Android device.
- While the steps are mentioning iPhone, however the same steps are also applicable for iPad.
- For other interesting articles, head to: Android, iOS, Games and Gaming, Tech, FREE Games and Stuffs and more on JILAXZONE.
- If you find this article / content inside is already obsolete, do let me know by commenting on the comment section below so that I can update the article to reflect the latest process/news. Thanks.
Now the issue is, if you have Android device and / or has family members or friends who are using Android, they can’t enjoy Live photos taken by iPhone. Well, at least not directly – as there’s actually a way you can share Live photos from iPhone into Android and retain the Live photos as moving photos. Here’s how you can do it.
Here’s how to transfer iPhone Live Photo to Android and see them as Live Photo
Simple answer is via Google Photos.
Yes, the simple answer is to do it via Google Photos. Feel free to figure it out yourself, however in case you need the detailed step by step, here you go.
1) Install Google Photos on both iPhone and Android
In case you don’t have Google Photos yet on your devices, here is the download link. Do note, certain Android devices, such as Google Pixel series, had already come with Google Photos preinstalled. Even though, they came preinstalled, you still need to ensure you are using the latest version of Google Photos.
2) Configure Google Photos on iPhone
Do the following steps on the iPhone.
a) Open Google Photos app from the iPhone. When asked to login, log in with your Google account.
b) Once logged in, tap on Google account icon located on top right of the screen (typically your photo here or your initial). Then tap on “Google Photos settings”.
c) Tap Backup & Sync.
d) Inside Backup & Sync, switch off “Back up & Sync” if it’s switched on by default. This is to save Google Photos storage so that you just upload photos you want to upload (instead of everything).
e) Find and tap on Upload Size. Choose either Storage saver (slightly reduced quality) (formerly known as High quality (free unlimited storage) or Original. My recommendation would be Storage saver.
3) Select Live Photos you want to backup to Google Photos
After you have configured Google Photos on the iPhone, now it’s time to select the Live photos you want to transfer over to Android.
a) Inside Google Photos app on the iPhone, go to “Photos” tab.
b) Find Live photos you want to transfer to Android. Tap and hold on one of the photos you would like to upload to enable selection mode, once in selection mode, select all live photos you want to transfer to Android.
c) Once you have selected all Live photos that you want to transfer into Android, tap on the “…” (3-dot) located on top right of the screen, and tap on “Back up”.
d) When prompted, “Update for Storage Saver / High Quality uploads, starting June 1, 2021 photos & videos that you back up in High Quality will count towards your Google Account storage”, tap “Got it”.
You can redo the steps above in case you have additional Live photos you want to transfer into Android.
4) Create Shared Album (Optional)
This step is optional and only to be done if you are transferring Live photos from your iPhone into someone else’s Android. If you are transferring Live photos from your iPhone to your own Android device, you can skip this step.
a) Inside Google Photos app on the iPhone, go to “Library” tab.
b) Under Albums, tap “+ New album” to create a new album.
c) Add a title for the album, then tap “+ Select photos” to start adding your Live photos.
d) Inside Add photos page, select the Live photos you want to share, tap on each one of them. Once done selecting all the Live photos, tap “Add”.
e) On the album page, tap on “Share”. Tap on any people you want to share to. In case you can’t find the people you want to share the Live photos to, tap on “Share to…” > “Create link”. When prompted “Create link to share”, tap on “Create link”. You’ll get notified that “Link sharing is on”. You have the URL link to share now. Send this link to the Android device (via SMS / WhatsApp / anything that can send the URL to the Android device).
5) Configure Google Photos on Android & See the iPhone Live Photos
a) Open Google Photos app from the Android. The app is labeled as “Photos”. When asked to login, log in with your Google account (if it’s your Android device) or log in with the Android device owner Google account (if the Android device belongs to him/her).
Once logged in, if the Android device is your own Android device:
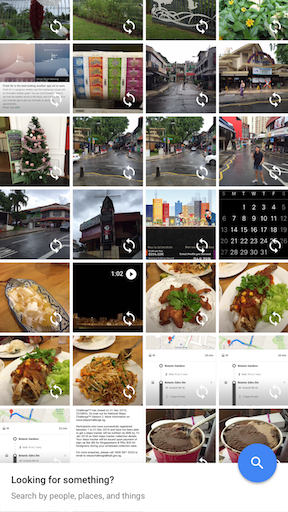
b) Go to “Photos” tab. You should be able to see your uploaded iPhone Live photos inside.
Once logged in, if the Android device belongs to someone else:
c) Ask the person to use the URL you shared earlier. When the URL is tapped / clicked, it will brought him/her into your Shared folder, where he/she can see all your shared iPhone Live photos inside.

That’s it! You just managed to transfer Live photos from iPhone into Android and still seeing the photos as Live photos (they are moving!)
Bring it all together
While the steps seemed like a complicated one, but I can assure you, they are not complicated. It’s just that, I couldn’t figure out the better way to shortened the steps / to tell while ensuring you get it correctly. Once you have followed the steps at least once, it should easily stick on your head, so the next time you need to transfer Live photos from iPhone and Android, you can just simply redo the steps without much hassles!
Do you have anything you want me to cover on my next article? Write them down on the comment section down below.
Alternatively, find more interesting topics on JILAXZONE:
JILAXZONE – Jon’s Interesting Life & Amazing eXperience ZONE.
Hi, thanks for reading my curated article. Since you are here and if you find this article is good and helping you in anyway, help me to spread the words by sharing this article to your family, friends, acquaintances so the benefits do not just stop at you, they will also get the same goodness and benefit from it.
Or if you wish, you can also buy me a coffee:

Thank you!
Live to Share. Share to Live. This blog is my life-long term project, for me to share my experiences and knowledge to the world which hopefully can be fruitful to those who read them and in the end hoping to become my life-long (passive) income.
My apologies. If you see ads appearing on this site and getting annoyed or disturb by them. As much as I want to share everything for free, unfortunately the domain and hosting used to host all these articles are not free. That’s the reason I need the ads running to offset the cost. While I won’t force you to see the ads, but it will be great and helpful if you are willing to turn off the ad-blocker while seeing this site.