AWS LightSail Bitnami WordPress Fix for CPU Utilization always high while CPU Bursting always remain zero
- This tutorial detailed the steps to identify and then fix the slowness happening on WordPress-based website.
- This tutorial is intended for self-hosted WordPress website.
- For other interesting articles, do check it out here WordPress, Gaming & Games, Android, iOS, Tech or more at JILAXZONE.
- If you find this article / content inside is already obsolete, do let me know by commenting on the comment section below so that I can update the article to reflect the latest process/news. Thanks.
Even though this article specifically intended for those who are using Bitnami version of WordPress and hosted on AWS LightSail Linux instance, but many of the methods I shared below are also applicable to other flavors of WordPress and can be done on other VPS hosting that is not AWS LightSail.
I wrote this article to share with all of you who are the WordPress-based website owner or administrator that often – if not always – find your website is not responding nor opening when requested resulting in loss of incoming website traffics (which can hurt your bottom line – loss in sales / advertisement income). You may want to do the methods I shared below before upgrading your AWS LightSail instance / other VPS to higher tier, because not only it will be a hassle process for you to move to a new higher tier but also it will incur you higher monthly fees and worst is after upgrading to higher tier, the issues (website not opening nor responding) are still persists.
In most cases, the issues where WordPress-based website is not opening nor responding can be grouped into big 2 categories:
- Issue category #1: Happy issue.
- Issue category #2: Bad issue.
Issue category #1: Happy issue.
The reason why your WordPress-based website is always – if you are using AWS LightSail: having its CPU utilization high while CPU bursting always remain zero – resulting page not responding nor opening is due to real increase in traffic. There are more and more real people flock in to your website. If you are facing with this issue – I called as happy issue – you should then be happy. However, don’t be happy yet before you know the second category below.
Issue category #2: Bad issue.
Another reason why your WordPress-based website is always – if you are using AWS LightSail: having its CPU utilization high while CPU bursting always remain zero – resulting page not responding nor opening is due to increase in traffic, but unfortunately they are not real traffic from real persons interested to see your website contents, but rather either bots or any individual or organizations trying to hack / get access / take over your website.
Therefore, I have written the steps below for you to check and conclude to which category your issues are: happy issue or bad issue.
Here’s how to check, identify and fix for WordPress website that is not opening nor responding
Like I mentioned earlier, I wrote this article specifically for those who are using Bitnami version of WordPress and hosted on AWS LightSail whose CPU Utilization always remain high while CPU Bursting always remain zero, however many of the methods I shared below are also applicable to other flavors of WordPress and can be done on other VPS hosting that is not AWS LightSail.
Here they are:
1) Check your own public IP address. You can use the link shared below to get your public IP address. Note down somewhere your “Public IP address” and the “Name Address” which typically your Internet ISP name. Noting them down is important, because you don’t want to block yourself during the process identifying any culprits.
| Link to check Public IP Address | https://www.ipchicken.com/ |

2) Connect to Linux Shell where WordPress is installed and running. On AWS LightSail Linux instance, you can use the link below to access WordPress instances. Login when prompted, then navigate to Instances > (Select your WordPress instance) > Connect > Connect using SSH to open the AWS LightSail WordPress instance Linux shell.
| Link to AWS LightSail instance(s) | https://lightsail.aws.amazon.com/ls/webapp/home/instances |
3) Get list of IP Address accessing your WordPress website. Once connected to your WordPress Linux shell, run the following command to list all of IP Addresses accessing your WordPress website. Take note of those IP addresses.
tail -n 10000 /opt/bitnami/apache2/logs/access_log | awk '{print $1}'| sort| uniq -c| sort -nr| head -n 104) Get detail of each of the IP Addresses. Based on the list of IP addresses you get from previous steps, use the link below to get the details of the IP addresses, such as hostname, ISP, Organization, Services, Continent, Country and City.
| Link to get detail of IP Address | https://whatismyipaddress.com/ip-lookup |
If the details you get is the same or similar to details of your own IP address (what you get from Step #1), then remove the IP address from the list. Then keep the remaining IP addresses on your list as they are going to be used for the next few steps. The next few steps are to check the detail activities as well as to block the IP addresses having suspicious activities to your WordPress website. You don’t want end up having your own IP address to be blocked, thus need to perform the checking and to remove your own IP address from the list.
5) Find out what are the activities done by the IP Address accessing your website. Go back to your WordPress instance Linux shell, run the following command for each of the remaining IP addresses to find out what the activities these IP addresses are doing to your WordPress website.
cat /opt/bitnami/apache2/logs/access_log | grep <IP_ADDRESS>Replace <IP_ADDRESS> with the IP address you have on your remaining list.
Article continues below.
Popular on JILAXZONE today:
6) For each IP Address, read the access log for any suspicious activities done to your website. After running the command from previous step, the Linux shell will show you the detail activities done to your WordPress website. For any IP address (that are not your own IP addresses), find out if they are doing these actions:
| “POST /wp-login.php HTTP/1.1” |
| “POST /xmlrpc.php HTTP/1.1” |
The first one “wp-login.php” means the IP address is trying to access your WordPress login page, whereas the second “xmlrpc.php” means the IP address is trying to gain remote access your WordPress website.
This is what I categorized as issue #2: bad issue as they are not real traffic but rather bots / hackers trying to get access into your website and while they are trying to get access into, they exhausted your WordPress instance resources (if you are using AWS LightSail, the CPU utilization will remain high as well as the CPU bursting will remain low or zero). These IP addresses doing these suspicious actions need to be blocked from accessing your WordPress website. Continue to next step for step to block them.
7) For each IP Addresses that does suspicious activities, to block them from accessing your WordPress website. Run the following command to block / unblock / add into rule(s) and to schedule them.
| WARNING! DO NOT ever leave the <IP_ADDRESS> to be blank, otherwise you are locking yourself out. Replace the <IP_ADDRESS> with the suspicious IP address you get from previous steps. |
a) To block IP address. Run this command to add IP address to the block list.
sudo su
iptables -A INPUT -s <IP_ADDRESS> -j DROP
b) To unblock IP address. This is optional step and only run this command to remove IP address from the block list in case you wrongly identify any IP addresses.
sudo su
iptables -D INPUT -s <IP_ADDRESS> -j DROP
c) To add the block / unblock to iptables-rules. This step is required, to put all the blocked IP addresses into iptables-rules for scheduling. Read the reason on the next step.
sudo su
iptables-save > /opt/bitnami/iptables-rules
d) To add the iptable-rules to crontab (scheduler). This step is required so that the blocked IP addresses are remain blocked after any server restart as the scheduler will restore the iptables-rules that contains the blocked IP addresses after server restart.
Use this command to open the crontab file.
crontab -eThen type the following syntax at the end of crontab file.
@reboot /sbin/iptables-restore < /opt/bitnami/iptables-rulesSave the crontab file and exit. Once you have done all these steps, each time your WordPress server requires a restart, the blocked IP addresses will remain block as the scheduler will always execute the iptables-rules containing the blocked IP addresses.
8) Disable XML-RPC on your WordPress website. After blocking suspicious IP addresses, next step is to disable XML-RPC. XML-RPC is the protocol that enable remote calls / access to your WordPress website. If you are always accessing your WordPress website via browser then you won’t need this XML-RPC to be on. The steps below are to be done on your WordPress admin console. Login to your WordPress admin console.
a) Get the Disable XML-RPC plugin. Once logged in to WordPress Admin console, on your left menu, go to Plugins > Add New. Find plugin that can disable XML-RPC, then install. I used Disable XML-RPC-API plugin by Neatma, however you can go and search and find anything else that suits you, as long as 1) the plugin support disabling of XML-RPC and 2) the plugin support your version of WordPress. I chose Neatma because it’s compatible with my current version of WordPress. FYI, I have no affiliation with Neatma.
b) Configure plugin to disable XML-RPC. Depending on which XML-RPC plugin you installed, the menu appearing on your WordPress admin console could be different. If you are following me using Disable XML-RPC-API plugin by Neatma, on WordPress menu on the left, go to XML-RPC Security > XML-RPC Settings. Then switch off the XML-RPC-API Master switch – which means disabling XML-RPC calls.
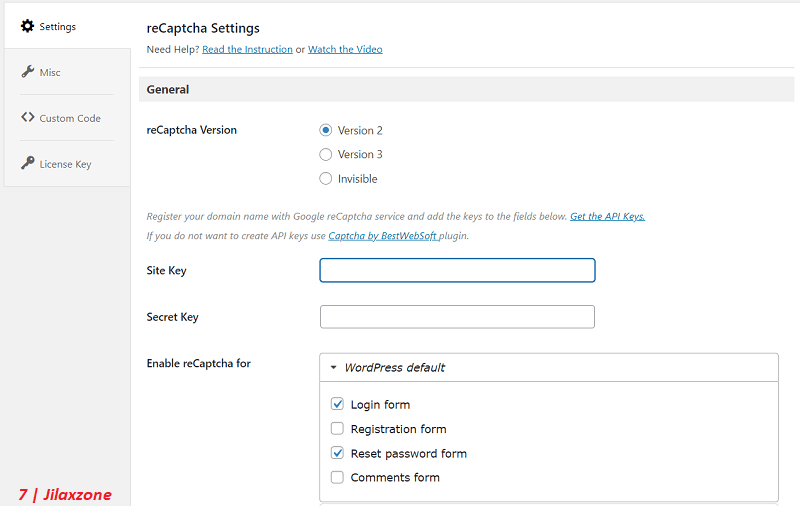
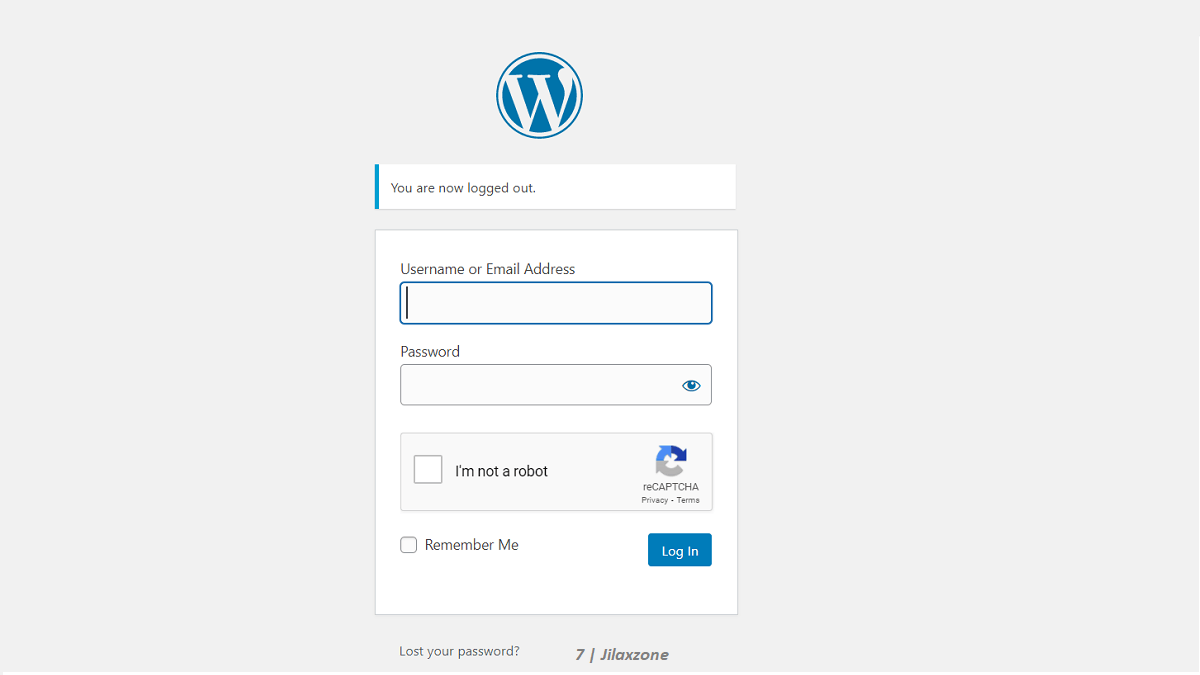
9) Enable captcha on your WordPress website. Next step is to enable captcha on your WordPress website, so in the case there are newer IP addresses trying to get access into your WordPress website by going to your login page (“wp-login.php”), they won’t be able to do via brute force method (and won’t exhaust your WordPress or AWS LightSail resources). Read the details for FREE, easy and simple steps here: Here’s how to setup and enable Captcha on WordPress website at JILAXZONE.
10) Monitor your AWS LightSail CPU Burst Capacity and set alert. After all the steps you have done, monitor your AWS LightSail CPU utilization and CPU Burst capacity to see if there is improvement to the resources used. Set alert to notify you whenever there are spikes happening.
Bring it all together
Keep monitoring the AWS LightSail resources and keep repeating the steps above to see if there are new potential suspicious IP addresses accessing your WordPress website. If you find no more suspicious IP addresses accessing your website but you still keep encountering AWS LightSail resource issue (CPU utilization always remain high and CPU Bursting always remain low or zero), then likely you are hit with issue category #1: a happy issue – your website is really growing in audiences as there are more and more traffic coming to your website. In that case, congrats to you!
In case you are having difficulties in any of the steps above, don’t hesitate to ask for help on the comment section down below. I’ll be happy to assist. Cheers!
Do you have anything you want me to cover on my next article? Write them down on the comment section down below.
Alternatively, find more interesting topics on JILAXZONE:
JILAXZONE – Jon’s Interesting Life & Amazing eXperience ZONE.
Hi, thanks for reading my curated article. Since you are here and if you find this article is good and helping you in anyway, help me to spread the words by sharing this article to your family, friends, acquaintances so the benefits do not just stop at you, they will also get the same goodness and benefit from it.
Or if you wish, you can also buy me a coffee:

Thank you!
Live to Share. Share to Live. This blog is my life-long term project, for me to share my experiences and knowledge to the world which hopefully can be fruitful to those who read them and in the end hoping to become my life-long (passive) income.
My apologies. If you see ads appearing on this site and getting annoyed or disturb by them. As much as I want to share everything for free, unfortunately the domain and hosting used to host all these articles are not free. That’s the reason I need the ads running to offset the cost. While I won’t force you to see the ads, but it will be great and helpful if you are willing to turn off the ad-blocker while seeing this site.
Thank you very much!!
GREAT tutorial!!! I was able to done it all correctly!
Hi Gustavo,
Glad it works for you.
Thank you for this. I had never been able to work out what was causing a high load on the server. This helped to identify.
In step 7, “sudo su iptables…” didn’t work, but “sudo iptables…” does.
I found a website that checks the location details of multiple (up to 100) ip addresses at once: https://www.showmyip.com/bulk-ip-lookup/
Hi Anita,
Glad it helped you to identify and thanks for sharing your finding!
Hi
Thank you so much for this article. I found it very useful.
Hi Nyass,
Glad if you found it useful.
Great stuff!
Thank you very much