It’s 2018, last year Apple has introduced a next generation iPhone – the iPhone X – which is totally different from the past 10-years iPhone ever released before it. It comes full of screen and without home button. But then as of today, creating iPhone ringtone has never really improved since Apple introduced iPhone to this world 10 years back.
Ever wonder what’s the reason?
DRM and bunch of other security and legal reasons.
Since I, myself, find it super hassle to create a custom ringtone, thus I would like to publish it here, so at least the next time I need to convert and create custom ringtone for iPhone, I don’t need to jump between websites to gather the complete information on how to create a custom ringtone for my iPhone. If any Android users read this article, yes you guys can pity me and the rest iPhone users for having such complicated way just to create something basic: custom ringtone for the phone.
Tools required to create custom iPhone ringtone.
1. Computer with iTunes installed (PC or Mac).
2. Song you want to make it as your ringtone (preferably MP3 file).
3. And of course, the iPhone.
Let’s get started.
Creating custom iPhone ringtone boils down into these 7 steps. Sorry, currently there’s no one button do-it-all.
All the steps below is done on iTunes 12 and iPhone with iOS 11. For other generation of iTunes or other version of iOS, the steps might be slightly different but overall they are more or less the same.
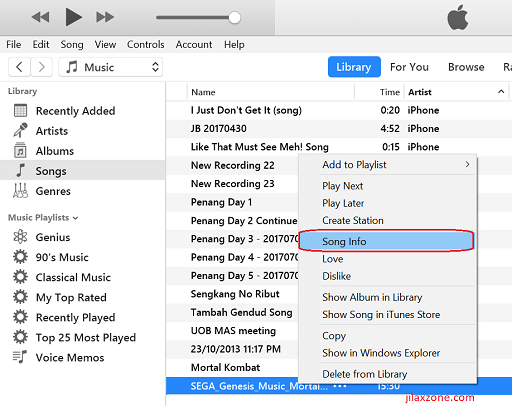
1. Open the song on iTunes and trim the song to be max 30 seconds-long.
Create custom iPhone Ringtone: Trim the song
On iTunes, do right click on the song you wish to use as the ringtone then select Song Info.
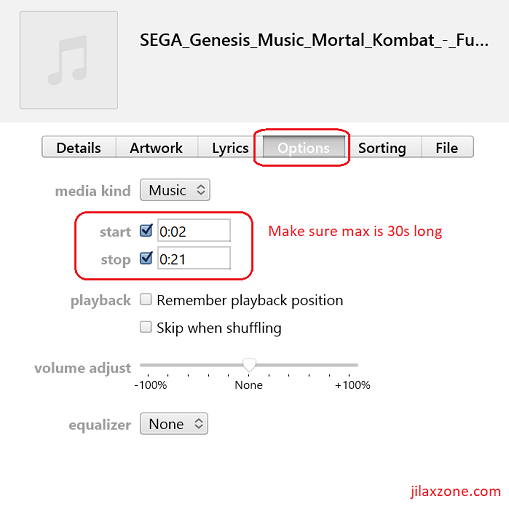
Create custom iPhone Ringtone: Trim to max 30 second long
On the Song window, go to Options, and adjust the start and stop to be max 30-second-long. Less than 30-second is fine.
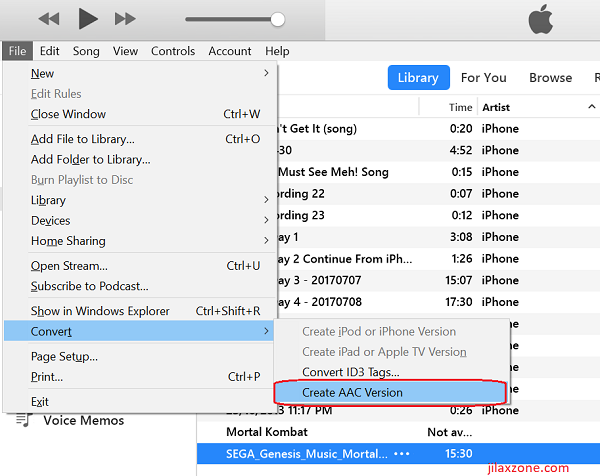
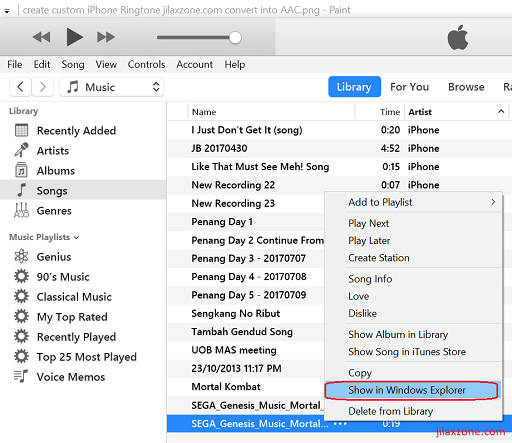
2. Convert the 30 second-long song to AAC format
Create custom iPhone Ringtone: Convert into AAC
On iTunes, go to File > Convert > Create AAC version.
Find other awesome articles, tips, tricks related to Life and Tech, iOS & Android quick review on:
Hi, thanks for reading my article. I do spend my time and efforts writing this article based on my own experiences for my own journal as well as to share the knowledge to whoever read it so hopefully they can get the benefit out of it
If you find and feel this article is good and helping you in anyway, help me to spread the words by sharing this article to your family, friends, acquaintances so all this goodness, my spent time and efforts do not just stop at you, they will also get the same goodness and benefit from it.

Thanks for sharing this information…
Hi Peter,
You’re welcome!
Hi jonathan
Hi Peter,
Anything I can help?
Awesome article, Thank you for sharing it. To download default ringtones go to https://www.mobilesringtones.com
Enjoy Latest Ringtones for iphone, Free of Cost!!!!!!!!!!
http://cellbeat.com/